Image Transfers onto Clay Surfaces – Part 2
I have been continuing my work with waterslide transfers (decals) onto clay surfaces and I am still finding myself enjoying it. I have owe a debt of gratitude to Danielle Maheu who is absolutely amazing with photoshop and has been a great help. Check out her photographic work @
http://www.daniellemaheu.com


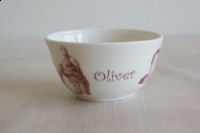
My daughter has a friend who is very special to her and when his birthday was approaching a couple of months ago, I thought that he deserved a very special gift, so I thought I would make up a bowl that was fitting. I asked his Mom for some photos of their family and also asked about things that he liked the best. Her reply was sharks, planets, his family and Steve Irwin. I found some images that I thought would fit well on this piece and began working with Danielle to get the decals sized for the bowl. I made up a bowl that I glaze fired to cone 6 and once it was complete, I began the task of getting the decals ready.
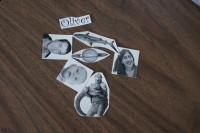
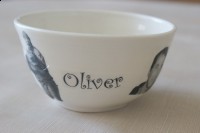
After I printed the images on the decal paper, I cut each image out and got ready to adhere them to the surface of the outside of the bowl. Once the image is soaked in warm water for 45 seconds to 60 seconds, it slides off and is ready to be attached to the surface. After the image is adhered, the excess water must be sponged off to avoid air being trapped. You must let the dry for 12 hours before firing it and it would be fired 6 cones lower than your glaze firing. So far I have good luck with these and I guess I have been very careful to ensure that they are flat and that no air gets trapped. Once the piece has gone through this 3rd firing, you will get sepia toned images and I really like the look of them.
